

You can set up a Meshtastic node for about $25. The physics are real. The default security settings are not.
The storm cell parks over your county and doesn’t move. Power goes first. Then the cell tower — not because it fell over, but because everybody within five miles is on it at once and the backup generator is doing what backup generators do. Your text to your wife says Delivered and then, twenty minutes later, doesn’t.
This is the gap most people never plan for. Not the collapse of civilization. The eight hours where the infrastructure is technically fine and completely useless to you.
To set up a Meshtastic node you need a $25 LoRa board, a phone, about forty minutes, and a willingness to hear the part nobody puts in the YouTube thumbnail: a mesh network only works if there’s a mesh. Buy the radio, absolutely. Just know what you bought before the lights go out.
Here’s the whole thing — hardware, firmware, the security setting almost everyone leaves on default, and an honest accounting of what this gets you.
Table of Contents
What Is a Meshtastic Node?
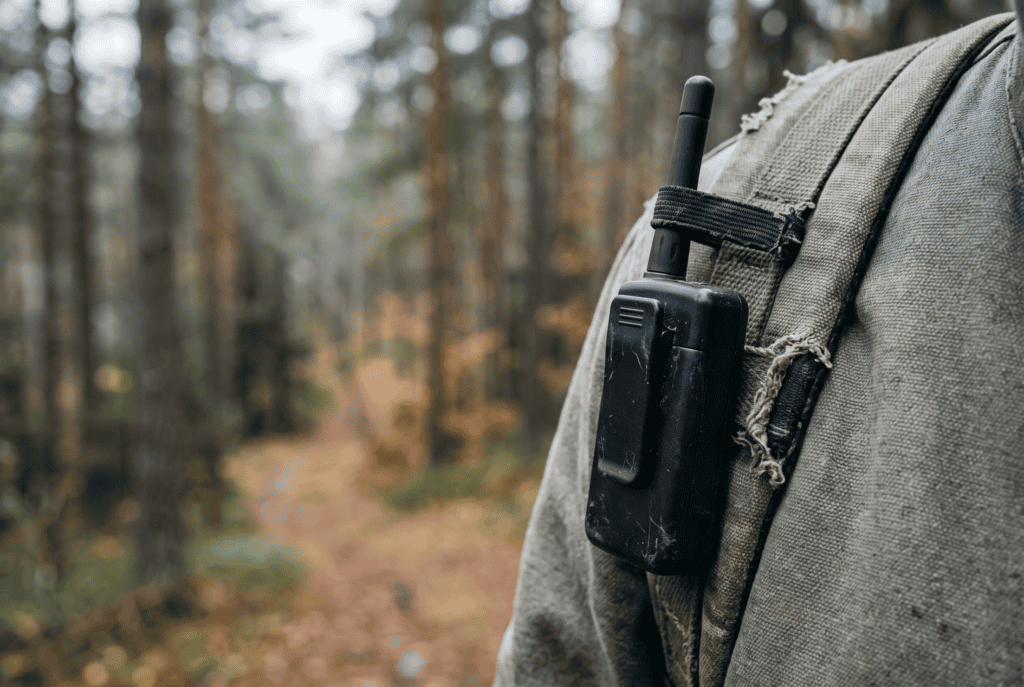
A Meshtastic node is a small, cheap radio running open-source firmware that sends short text messages over LoRa — a long-range, very low-bandwidth radio format. You pair it to your phone over Bluetooth, type into an app, and the radio does the rest. No cell tower, no internet, no subscription.
The “mesh” part is what makes it interesting. Every node relays messages it receives, so a message can hop from your radio through a stranger’s radio to reach someone twenty miles away that you could never reach directly. That’s the promise.
The “low-bandwidth” part is what people skip. The default US preset, LongFast, runs at roughly 1.07 kbps with a 153 dB link budget, per the official Meshtastic radio settings docs. That’s text. Short text. No voice, no photos, no maps. A tweet, sent by carrier pigeon that happens to travel at the speed of light.
Reasons You Need to Know How to Set Up a Meshtastic Node
Most off-grid comms advice assumes you have a license, an antenna farm, and a Saturday to spare. Meshtastic is the first option in years that a normal person can actually deploy — which is exactly why it deserves scrutiny rather than enthusiasm.
Worth learning because:
- It runs license-free. In the US, Meshtastic operates in the 902–928 MHz ISM band. No amateur radio license required, unlike most of the gear preppers reach for first. A license buys you more power and more capability, but you don’t need one to start.
- The cost of entry is a tank of gas. A working node starts around $18–35 for a Heltec V3 board (checked August 2026). Two of them cost less than one decent handheld.
- It survives what phones don’t. No tower, no carrier, no data plan, and a node sips power measured in milliamps rather than watts.
- It fails in an honest, visible way. When there’s nobody in range, the app tells you there’s nobody in range. Compare that to a phone showing three bars of a tower that’s dropping every third packet.
- Setup is a skill, not a purchase. The radio in a drawer with factory settings is a paperweight. The forty minutes below is the whole difference.
The method below front-loads the two steps everyone does last — checking whether a mesh exists near you, and changing the encryption key. Do those first and the rest is assembly.
Step-by-Step Instructions to Set Up a Meshtastic Node
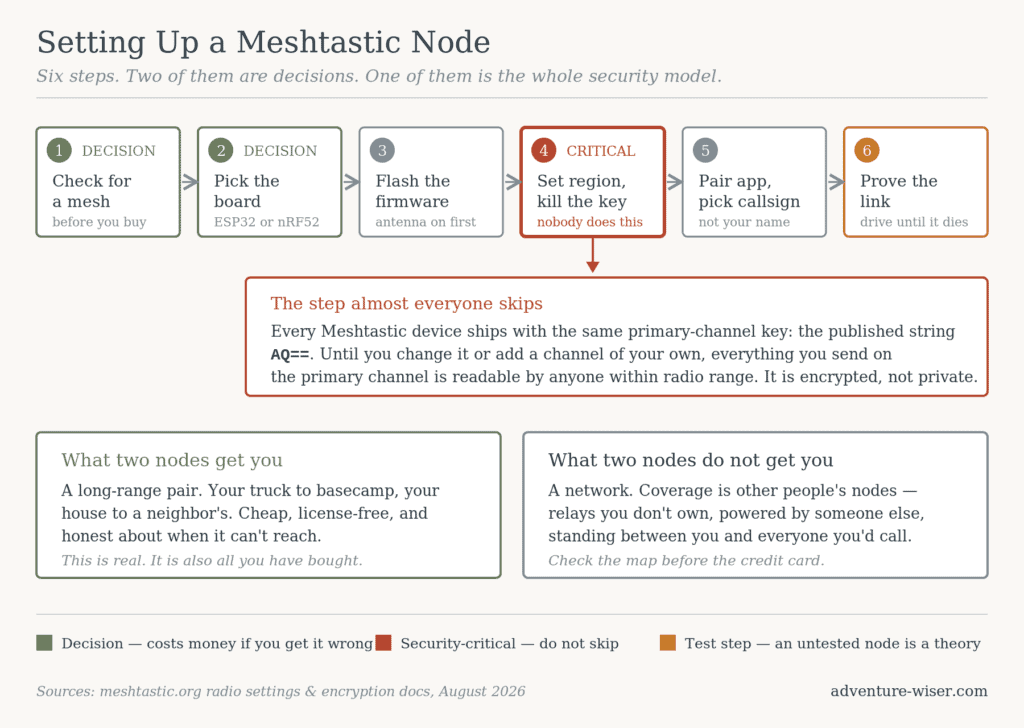
There’s no wizard for this. The official docs are good but organized for engineers, and the community guides tend to assume you already own the hardware. What follows is the order that wastes the least money and creates the fewest bricked boards.
- Find out if you have a mesh — before you spend a dollar
- Pick a board you won’t replace in a month
- Flash the firmware without bricking it
- Set your region, then kill the default key
- Pair the app and name the node something that isn’t your name
- Prove the link before you need it
Two of those six are decisions, not procedures. The actual button-pushing takes about twenty minutes. Here’s each one.
Step 1: Find Out If You Have a Mesh
Do this before buying anything.
Pull up a public Meshtastic node map — the community runs several, and most regional mesh groups publish coverage maps for their area. Look for nodes within realistic range of your house, your work, and wherever you’d go if you had to leave.
If you find a dozen nodes and an active regional group, you’re buying into a working network and the rest of this guide is straightforward. If you find nothing within forty miles, you are not buying a communications network. You are buying two radios that talk to each other, which is a walkie-talkie with extra steps and a longer reach.
That’s not nothing. A pair of nodes linking your house to your neighbor’s, or your truck to your basecamp, is genuinely useful. Just buy it knowing that’s what it is. Most of the disappointment in this hobby comes from people who expected a network and got a pair.
Step 2: Pick a Board You Won’t Replace in a Month
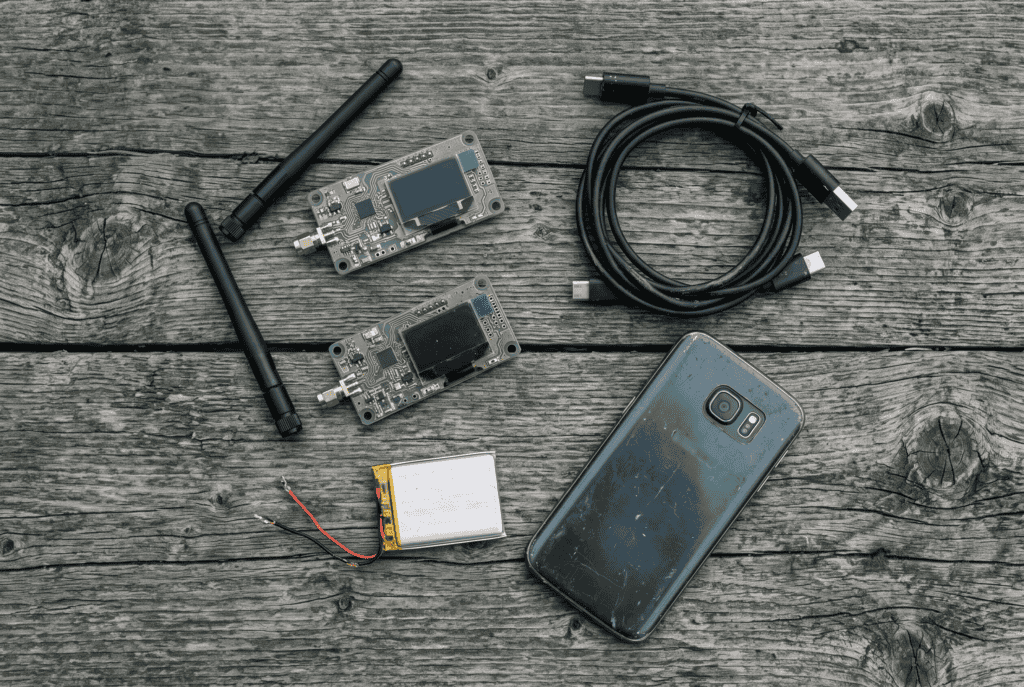
The chip inside matters more than the brand on the box.
ESP32 boards — the Heltec LoRa 32 V3 is the standard cheap entry point, roughly $18–35 depending on where you buy (checked August 2026). It has WiFi and Bluetooth, a tiny OLED screen, and no battery, no case, and no GPS. You’ll add a battery via the JST connector. Good first node, especially as an always-powered base station at the house.
nRF52 boards — the Seeed SenseCAP T1000-E runs $39.90 direct from Seeed (checked August 2026), arrives with Meshtastic already loaded, and is IP65-rated in a card-sized package with GPS. It is dramatically more power-efficient than ESP32, which matters for anything running on a battery or solar. If you want one node and no soldering, this is it.
All-in-one units — the LILYGO T-Deck Plus, roughly $100–140, has a screen and a physical keyboard, so it works without a phone. That independence is the whole argument for it: your phone is the most likely thing in the kit to be dead, as we covered in what to do when your phone dies in the field.
One hard rule from the official getting-started documentation, and it is not optional: never power the radio on without an antenna attached. Transmitting into nothing can destroy the radio chip. The antenna goes on first, every time, before USB.
Step 3: Flash the Firmware Without Bricking It
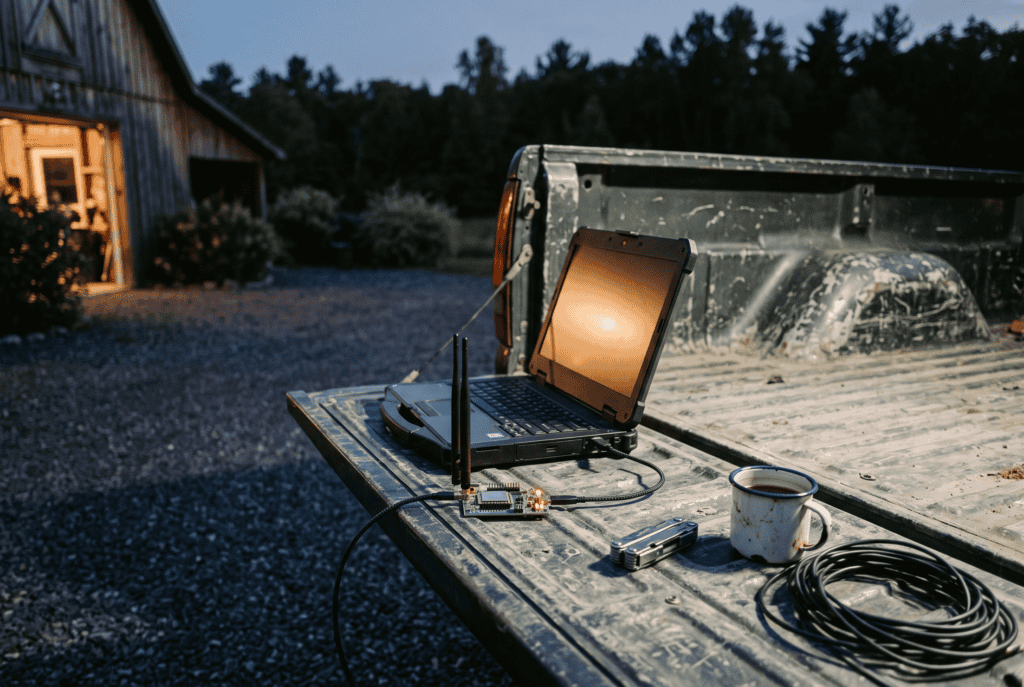
Two things kill more first attempts than anything else, and both are boring.
First, use a data cable. Plenty of USB-C cables only carry power. Test yours by moving a file to a phone with it. If the file moves, the cable works.
Second, know your chip. ESP32 boards usually need serial drivers installed on your computer. nRF52 and RP2040 boards use a UF2 bootloader and mount as a USB flash drive — you drag the firmware file onto them, no drivers at all.
Then go to the official Meshtastic web flasher, pick your device from the list, and choose the current stable firmware. As of August 2026 that’s the 2.7 line, which brought a rebuilt device interface called BaseUI; check the firmware releases page for what’s current when you read this. Flash it. Watch for the device to reboot.
If your board came with Meshtastic preinstalled — the T1000-E does — flash it anyway. Factory firmware is often a year behind, and the security improvements shipped since 2.5.0 are the ones that matter most.
Step 4: Set Your Region, Then Kill the Default Key
This is the step that separates a configured node from a decoration.
Set your region first. In the US, that’s the US setting — 902–928 MHz, up to +30 dBm ERP, as documented by Meshtastic. A node with the wrong region set will not talk to your neighbors and may not be legal where you live. It defaults to the LongFast preset, which is what nearly everyone runs. Leave it there — matching your local mesh matters more than optimizing.
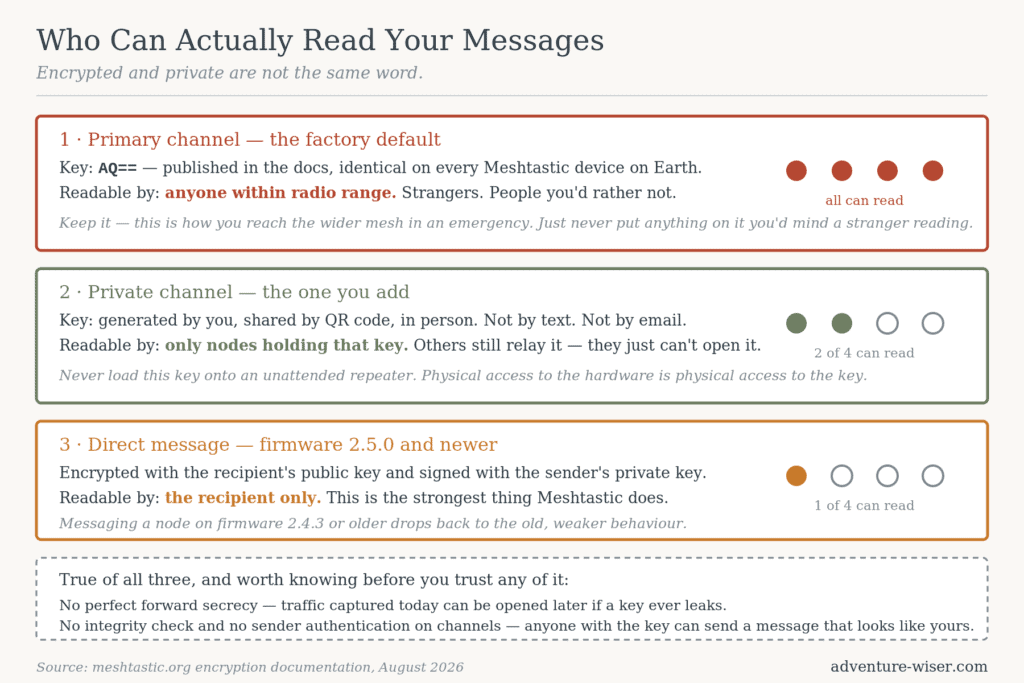
Now the part almost nobody does. Out of the box, your primary channel is encrypted with a default key — the literal string AQ== — that is published in the documentation and identical on every Meshtastic device on Earth. Anyone within radio range can read everything on it. The Meshtastic encryption docs say it plainly: to use real encryption you must change this key or create a new channel.
So do both. Keep the default public channel — that’s how you reach the wider mesh and how strangers reach you, which is the entire point in an emergency. Then add a second channel with a generated key for your family or group, and share it by QR code in person. Not by text. Not by email.
Three things to sit with while you’re in there:
- Meshtastic has no perfect forward secrecy. Traffic captured today can be decrypted later if your key ever leaks. Change group keys periodically.
- Channel messages have no integrity check and no sender authentication. Anyone holding your channel key can send a message that appears to come from you. Direct messages between nodes on firmware 2.5.0 or newer are better protected — those use public-key cryptography with signatures — but group chat is not.
- Never put a private key on an unattended node. A solar repeater on a hilltop relays traffic fine without your group key, and anyone who finds it can pull the key straight off the hardware.
Step 5: Pair the App and Name the Node Something That Isn’t Your Name
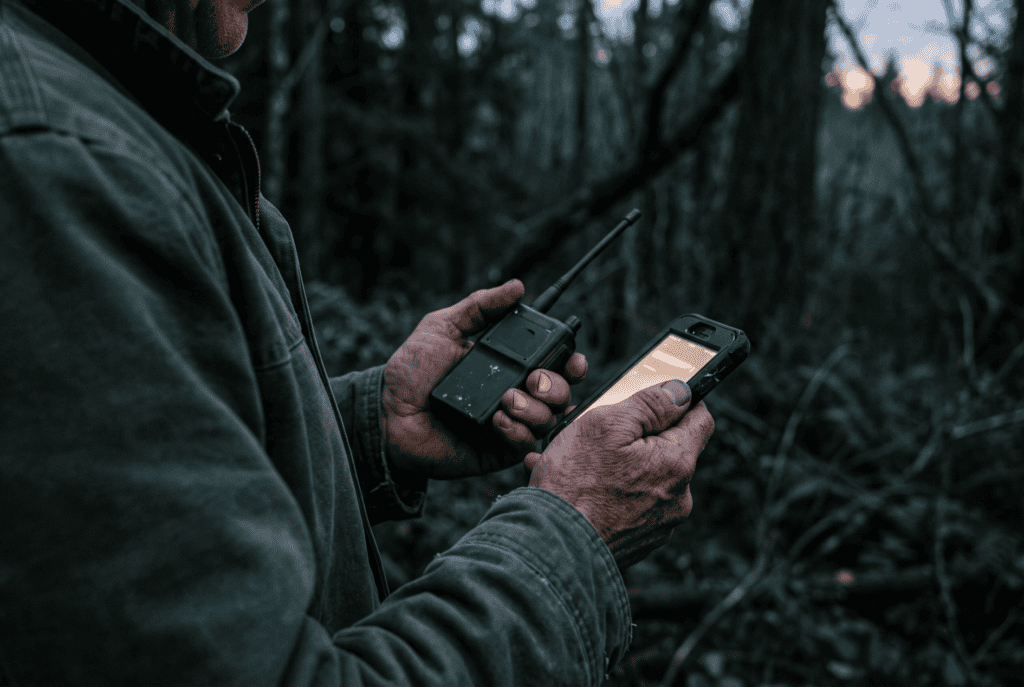
Install the Meshtastic app on your phone, enable Bluetooth, pair to the node, and enter the code it shows. That’s the easy half.
The half worth thinking about: your node broadcasts a short name and a long name to every radio in range, and by default it will happily broadcast GPS position on a timer. In an emergency that’s a feature — it’s how someone finds you. On an ordinary Tuesday it’s a beacon announcing that a specific named person owns expensive electronics at a specific address.
Pick a callsign, not your name. Turn the position beacon off, or set a very long interval, and turn it on deliberately when it’s useful. If you’re running a node at the house, consider a fixed position set slightly off — or none at all.
While you’re deciding what to transmit: position over a 1 kbps link is expensive in airtime. If you’re sending a location by hand, a six-digit MGRS grid is far more compact and far easier to read aloud than a decimal lat/long pair, which is one of several reasons we prefer it in MGRS vs lat long. The mesh will thank you and so will whoever’s writing it down.
Step 6: Prove the Link Before You Need It
An untested node is a theory.
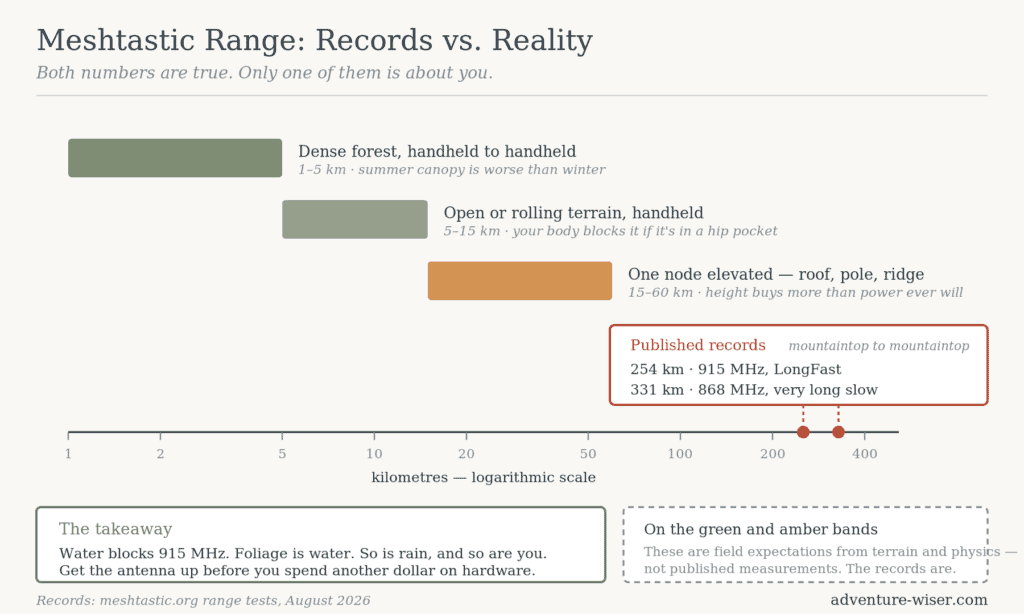
Take two nodes, hand one to somebody, and drive apart until messages stop arriving. Write down where that happened. Do it again with the second node up high — on a roof, on a pole, on the hill behind the house. The difference will be larger than you expect, because at these frequencies terrain and height beat power almost every time.
Then calibrate your expectations against reality. The official Meshtastic range records include a 331 km ground-to-ground link and a 254 km link at 915 MHz on LongFast. Those are mountaintop to mountaintop, with clear line of sight and good antennas. In wooded, rolling terrain — the Ouachitas, say — a handheld node talking to another handheld node is working in single-digit miles, and less in summer when the leaves are out.
If you can’t picture where the ridgelines fall between you and the other node, that’s a map problem before it’s a radio problem. Reading terrain off a topographic map will tell you more about where to put a node than another antenna will.
Water is the enemy. Foliage is water. So is rain, and so is your body when you put a node in a hip pocket.
Key Considerations After You Set Up a Meshtastic Node
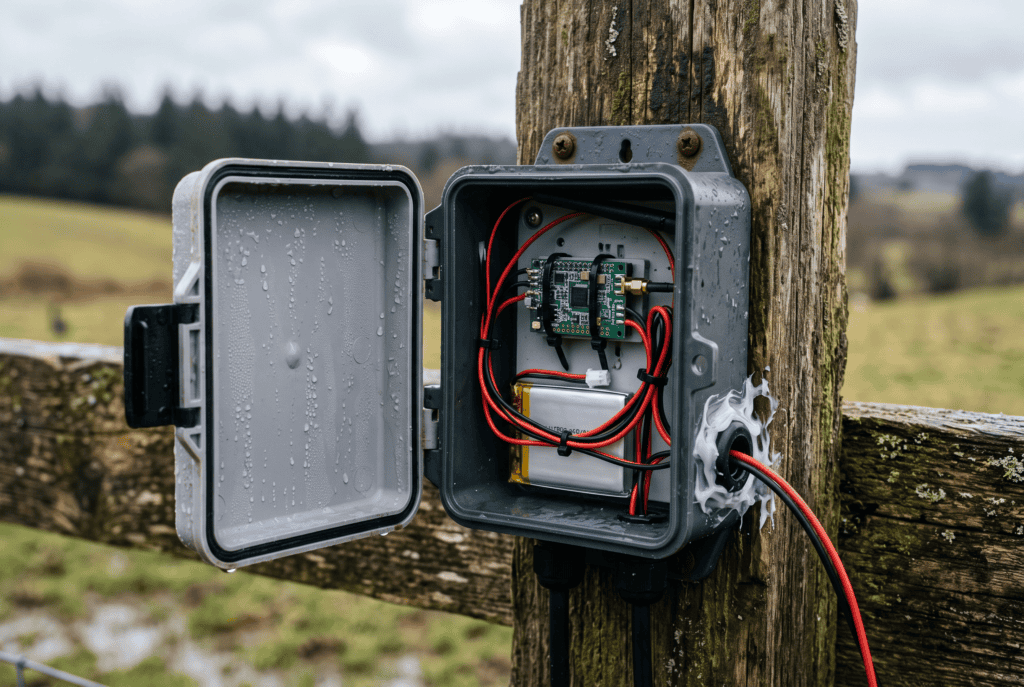
The most common failure isn’t technical. It’s that one person in a group sets up a node, nobody else does, and eleven months later the battery is flat and the firmware is four versions behind. Meshtastic is a group activity or it’s a novelty. Set up at least two nodes. Ideally get a neighbor onto the mesh, because a node between you and the people you want to reach is worth more than any antenna upgrade you can buy.
Power is the other quiet failure. A node is trivial to keep running — a small battery lasts days, a tiny solar panel lasts indefinitely — but “trivial” only happens if someone builds it. If you’re standing up a permanent node at the house, fold it into whatever you already run for home power redundancy rather than treating it as a separate project.
And be clear-eyed about what a mesh does in a genuine emergency. It carries short text between people who both prepared in advance. It does not call 911, reach anyone outside the mesh, or work at all if the other nodes went dark with the power. It belongs in the same layer of your planning as the rest of an urban survival kit — useful, specific, not a substitute for a plan.
Taking It to the Next Level: How to Build Actual Coverage
Once one node works, the upgrade path is unglamorous and effective.
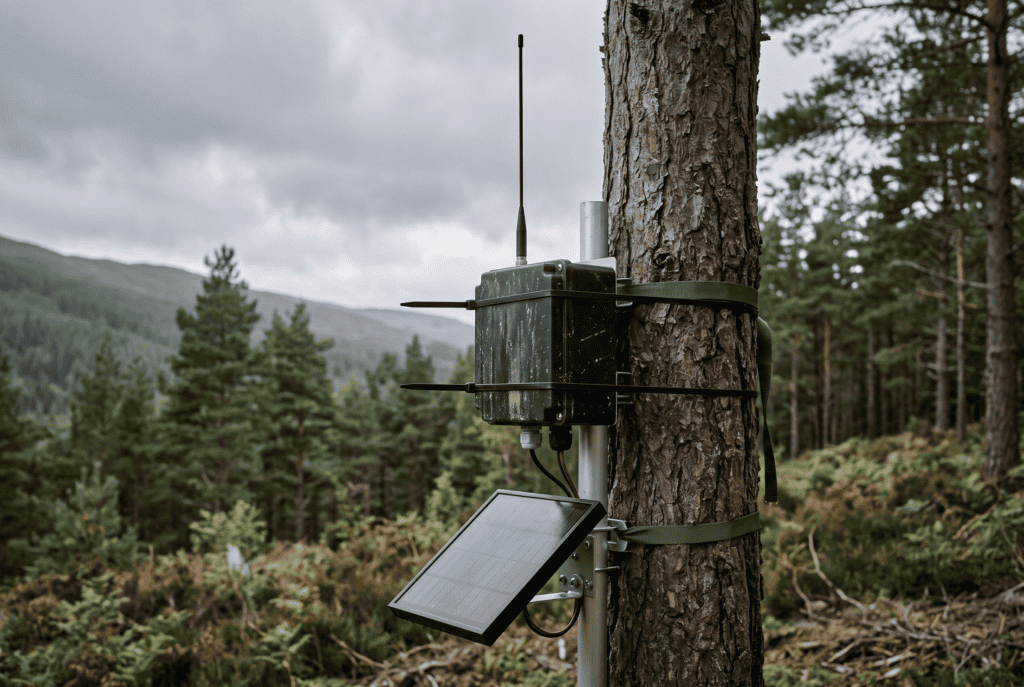
Antenna and height, in that order. The stock stub antenna on a cheap board is the weakest link in the system, and a decent 915 MHz antenna correctly matched to the band will beat any firmware setting you can change. After that, elevation. Ten feet of pole is worth more than ten watts you’re not legally allowed to transmit anyway.
Then add a router node. A dedicated node on a roof or ridge, configured in a router role and left alone on solar, is what turns two radios into a network. It’s also the node that should never hold your private key.
Then get your neighbors on it. This is the whole game. Coverage is other people. A regional mesh group will do more for your comms than another $200 of hardware, and joining one costs nothing.
Alternatives to Meshtastic
Meshtastic is not the only answer and for some readers it isn’t the right one.
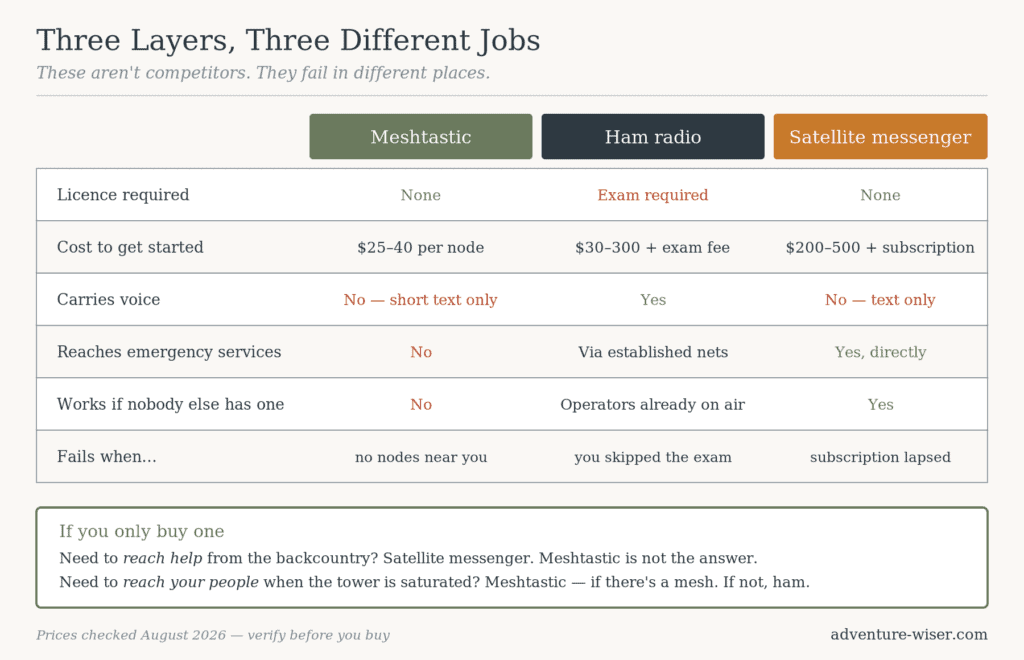
MeshCore runs on the same radios with a different routing philosophy, and the choice between them genuinely depends on what you’re building — we broke that down in Meshtastic vs MeshCore. If you’ve already bought hardware, you can try both.
Amateur radio remains the serious option. More power, voice, far greater range, real emergency networks with people already on them — at the cost of a license exam and a steeper learning curve. Our best ham radio for preppers picks are where to start, and honestly, a Technician license plus a $30 handheld outperforms a mesh with nobody on it.
Satellite messengers are the only option here that reaches somebody who can send help, anywhere, without needing a network to already exist. They cost a subscription. If the actual requirement is “reach emergency services from the backcountry,” this is the answer and Meshtastic is not.
Most people who take comms seriously end up running two of the three. Meshtastic is a good first layer precisely because it’s cheap enough to buy alongside something else.
Frequently Asked Questions
Do I need a ham radio license to set up a Meshtastic node? No. In the US, Meshtastic runs in the 902–928 MHz ISM band, which is license-free. A license lets you enable ham mode for higher power output, but the standard setup requires nothing.
How far will a Meshtastic node actually reach? Under real conditions with a handheld node, expect single-digit miles in wooded or hilly terrain and more in open country. The published records of 254–331 km were mountaintop-to-mountaintop with clear line of sight. Height and antenna quality matter more than anything else.
Is Meshtastic encrypted? Partly. Messages use AES256, but the default channel key is public and identical on every device — you must change it. Even then there’s no perfect forward secrecy, no message integrity check on channels, and no sender authentication. Direct messages on firmware 2.5.0+ are meaningfully stronger.
Can Meshtastic send voice or photos? No. LongFast moves about 1 kbps. It is a text-only system, and short text at that. Anyone promising voice over a standard Meshtastic node is describing different hardware.
What happens to Meshtastic if the power grid goes down? Your node runs fine on a battery. The other nodes are the question — a mesh that depends on mains-powered relays degrades within hours. Solar-powered repeaters are what make a mesh survive an extended outage.
How many nodes do I need to make this useful? Two, minimum, and they only talk to each other. Real usefulness starts when there are nodes you don’t own between you and the people you want to reach. Check your local coverage before buying.
Wrapping Up: My Experience Setting Up a Meshtastic Node
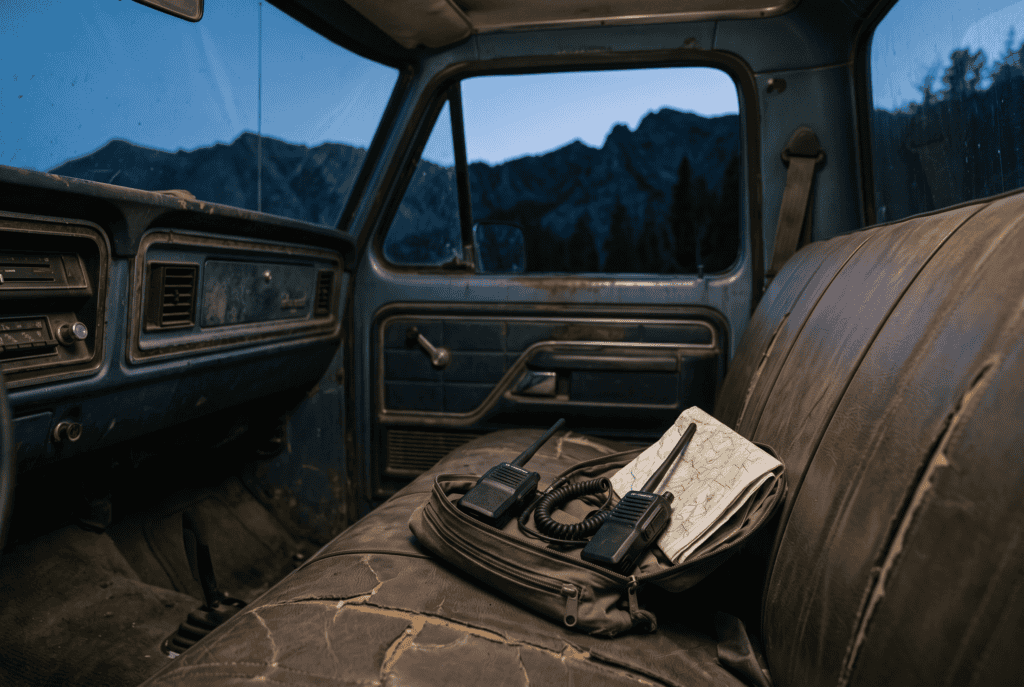
Here’s the honest part, and Adventure Wiser doesn’t do this any other way: I have not yet run Meshtastic in the field. No nodes on the ridge, no winter test, no range numbers of my own. Everything above comes from the official documentation, published range records, and the hardware specifications — all of it linked so you can check my work.
What I can tell you is what twenty years of watching gear fail suggests about this one. The physics are not in dispute; LoRa does what it says. The hardware is cheap enough that buying in is a low-stakes decision. The failure mode won’t be the radio — it’ll be a node in a drawer with a dead battery and the default key still set, owned by someone who bought it in a panic and never tested it. That’s the same way most preparedness gear fails, and it has nothing to do with Meshtastic.
Nodes are on order. When they’ve been through an Ouachita winter and a summer with the canopy full in, you’ll get the real numbers here, including the ones that make the technology look bad.
Until then: don’t buy a node this month. Before you spend a dollar to set up a Meshtastic node, spend twenty minutes on a coverage map and find out whether you’re joining a network or starting one. Then decide.
Want the rest of the layer this fits into? The free Adventure Wiser preparedness checklist covers the comms, power, and navigation gaps most kits miss.
Adventure Wiser tests gear in the field before it goes on the site. If it doesn’t hold up on the trail, it doesn’t make the cut — and when we haven’t tested something yet, we say so.
A node moves text between people who both have one. It does not get you into your bank — that needs a recovery plan that doesn’t depend on your phone.
A node is a supplement, not a comms plan. Here is how mesh fits alongside GMRS, ham and satellite — and what none of them can do.