

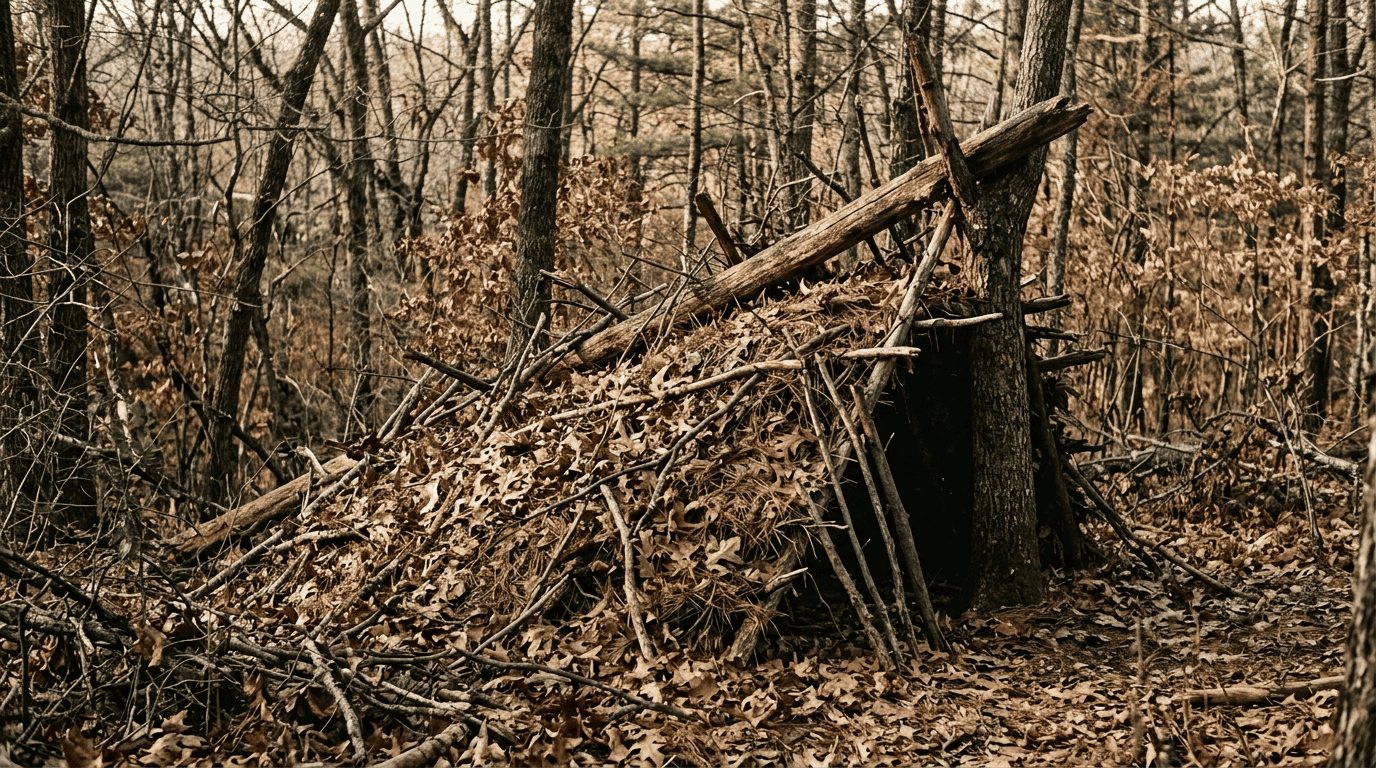

The temperature drops faster than you planned for. Your phone is dead, the truck is somewhere north of here, and the sun just went behind the ridge. You have no tarp, no knife, no cordage — just what’s on the ground around you and maybe four hours of usable light.
Here’s the part nobody tells you: the ground and the wind will kill you long before hunger does. Exposure can drop a healthy adult into serious hypothermia in a single wet 45-degree night. But the same forest that’s about to get very cold is also carrying every material you need — deadfall, leaf litter, standing snags, and a hundred natural windbreaks — and none of it requires a blade to assemble.
Build a proper natural shelter and you’re sleeping in something that holds body heat like a sleeping bag, sheds rain, and cost you nothing but sweat. I’ve built these in the Ouachitas with nothing but my hands, and the ones I built right kept me warm enough to be bored instead of scared. That’s the goal.
Below is the exact process for building a natural shelter, step by step, plus the mistakes that make the difference between a shelter and a pile of leaves you shiver in until dawn.
What Is a Natural Shelter?
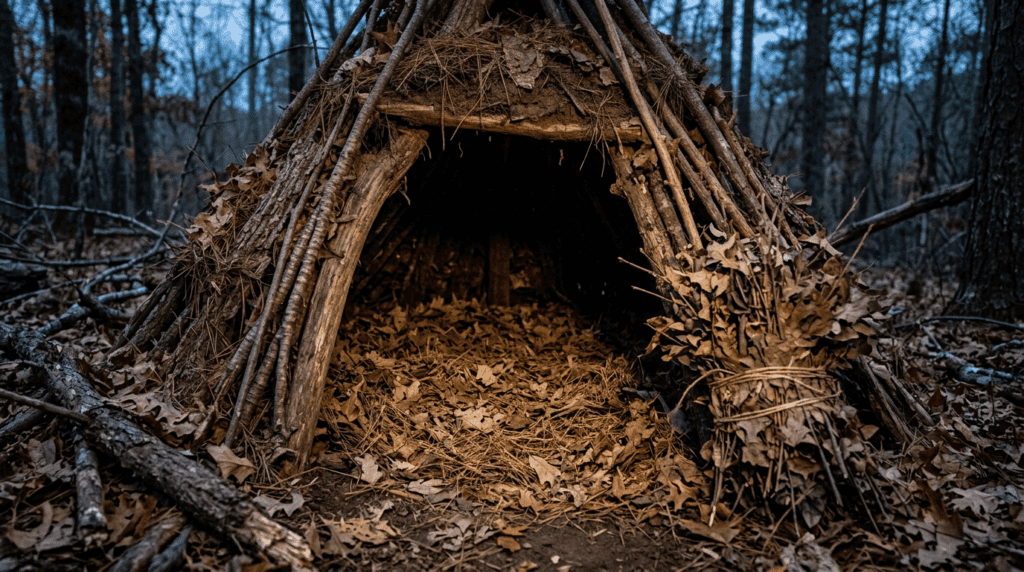
A natural shelter is any structure built entirely from materials already present in the environment — dead branches, bark, leaf litter, evergreen boughs, stone, or existing terrain features — assembled without tools, hardware, or manufactured cordage. The most reliable version for most of North America is the debris hut: a low, ribbed frame packed under a thick blanket of dead leaves and duff that traps dead air the way insulation in a wall does.
It’s not a cabin. It’s not comfortable. It’s a body-sized cocoon designed to do exactly two things — keep wind and water off you, and put insulation between your body and everything trying to steal its heat. Understand a natural shelter that way and the design decisions stop being arbitrary.
Reasons You Need to Know How to Build a Natural Shelter
Most people who die in the backcountry aren’t lost for weeks. They’re lost for one night, unprepared, and the weather does the rest. A natural shelter is the skill that buys you the time to be found — it outranks fire, water, and food in almost every short-duration survival scenario. And unlike fire, it works when everything is soaked.
Reasons this belongs in your skill stack:
- Gear fails or gets separated from you. Packs go over cliffs. Canoes flip. Day hikes turn into overnights.
- Hypothermia doesn’t need winter. Wet plus wind plus 50°F is a killer combination, and it’s the most common one.
- You may not be able to build a fire. Sustained rain, high wind, or a soaked fuel bed can shut down fire-making completely. Shelter still works.
- It’s the highest heat-return per calorie spent. A good natural shelter costs you two hours of work and pays back all night, every night.
- It buys search-and-rescue time. Staying put in a warm natural shelter is how people get found. Wandering to stay warm is how they don’t.
- It builds real terrain-reading skill. Choosing a natural shelter site sharpens the same judgment you use for navigation, water, and campsite selection.
The natural shelter method below is the one I keep coming back to because it’s tool-free, works in mixed hardwood and pine forest, and scales down to a single person moving fast in fading light. Nothing exotic. No lashings, no notches, no whittling. Just leverage, gravity, and a lot of leaves.
Step-by-Step Instructions to Build a Natural Shelter Without Tools
The natural shelter process is deliberately front-loaded: you spend your best light and energy on decisions, not construction. Pick the wrong site and no amount of debris saves you. Pick the right one and half the shelter is already built.
Here’s the full sequence:
- Read the Ground — choose a site that’s already doing work for you
- Find Your Ridgepole — set the structural spine
- Set the Ribs — build the skeleton
- Lay the Lattice — create the mesh that holds debris
- Shingle the Debris — pile insulation until it feels absurd, then add more
- Stuff the Bed and Plug the Door — insulate underneath and seal the opening
Each step below covers the how and the why, plus the specific failure mode that step exists to prevent. Work in order — skipping ahead to piling leaves is the single most common way these shelters fail.
Step 1: Read the Ground

Before you touch a branch, walk the area for ten minutes and let the terrain tell you where your natural shelter belongs.
You’re looking for four things. Dry, elevated ground — never a drainage, gully, or the low point in a bowl, because cold air pools there and water runs through it at 2 a.m. A natural windbreak — the lee side of a boulder, root ball, downed log, or dense thicket. A deep debris supply — you need an enormous volume of dry leaf litter, so build inside the leaves, not a hundred yards from them. Overhead safety — look up and check for widowmakers, dead limbs, and leaning snags. More people get hurt by what’s above a shelter site than by anything else.
Avoid the bottom of slopes, exposed ridgelines, the base of standing dead trees, and anywhere with obvious game trails or heavy insect activity. If you find a root ball from a blown-over tree or a fallen log with a slight gap underneath, you’ve just saved yourself an hour — those become the anchor for the next step.
Step 2: Find Your Ridgepole
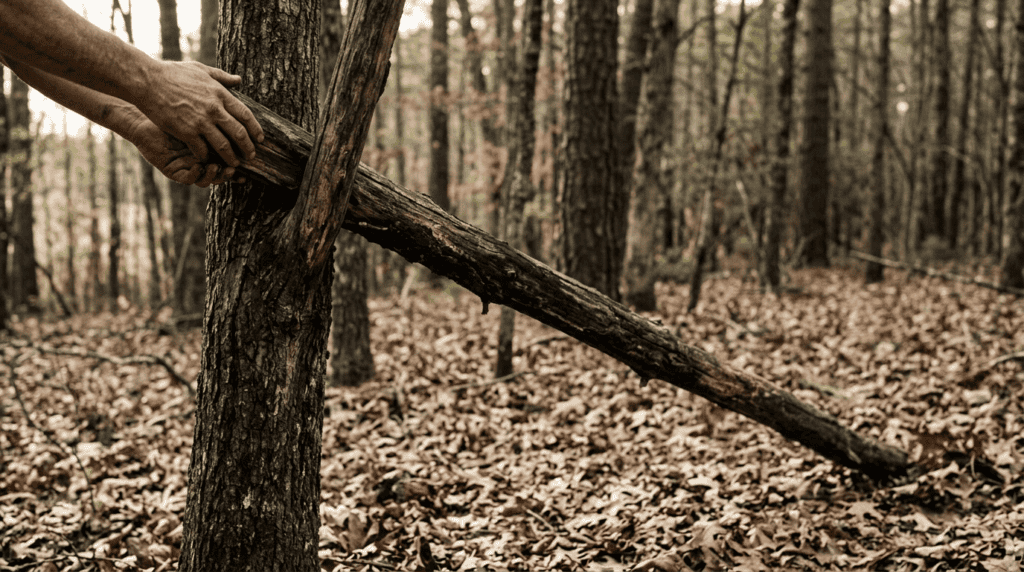
The ridgepole is the spine of the shelter and the only piece that has to be strong. Everything else is filler.
Find a dead, solid branch or small trunk roughly 1.5 times your body length — long enough that you fit under it with room at your head and feet. It should be thick enough that you can’t snap it over your knee, but light enough that you can drag it. Test it: stomp on the middle. If it cracks, it’s punky and rotten. Find another.
Set one end about hip height — into the crotch of a standing tree, on top of a stump, across a boulder, or braced against a fallen log. The other end goes on the ground. That’s it. You’ve now got a long triangular volume that will become your interior.
Two critical checks. First, the high end should be just tall enough for you to sit up slightly and slide in — no taller. Every extra inch of interior volume is air your body has to heat. Second, put the head-end into the wind’s back — orient the natural shelter so the closed low end faces the prevailing wind and the opening faces away from it.
Step 3: Set the Ribs
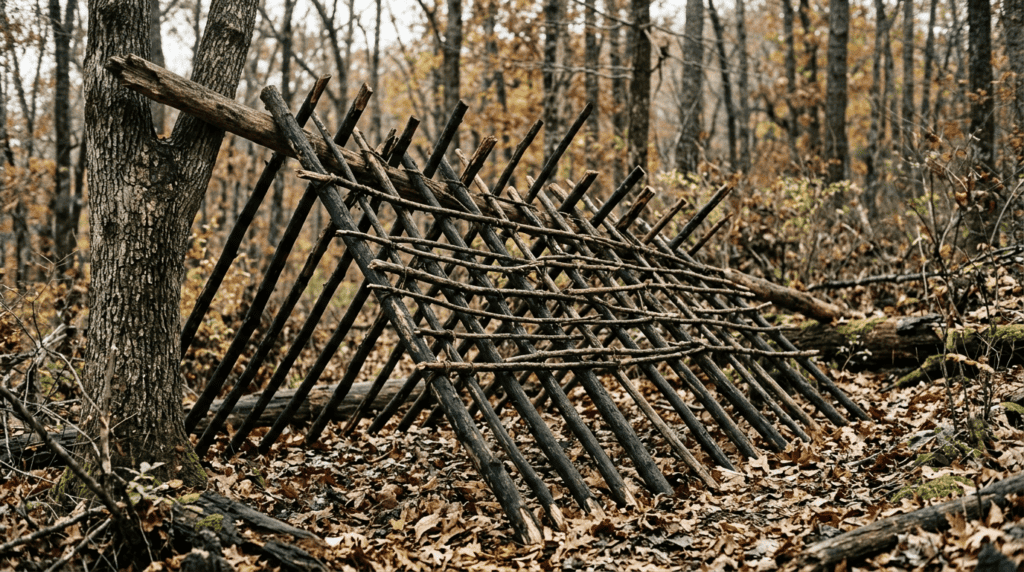
Now lean shorter dead branches against both sides of the ridgepole at roughly a 45-degree angle, like ribs off a spine, working from the high end to the low end.
Space them about a hand’s width apart. Push the base of each rib firmly into the ground so it bites and doesn’t slide out when the debris load goes on. Angle matters more than you’d think — too shallow and rain runs into the shelter instead of off it; too steep and you lose interior room and the debris slides off.
Keep the interior tight. When you crawl in to test, your shoulders should nearly brush both sides. A shelter you can stretch out in is a shelter you’ll shiver in. If you’ve got the ribs wide enough to feel roomy, pull them in.
Leave a gap at the high end for the entrance and rib everything else — including the low end, which should close off completely.
Step 4: Lay the Lattice
The ribs alone will let leaves fall straight through. The lattice is what stops that.
Pile smaller branches, twigs, brush, briars, and evergreen boughs crosswise over the ribs to create a rough mesh. It doesn’t need to be pretty and it doesn’t need to be tight — you’re just creating enough snag points that leaf litter has something to catch on. Brushy, twiggy material is ideal here; smooth straight sticks are nearly useless.
This is a five-minute step people skip constantly, and it’s why their debris ends up on the ground instead of on the roof. Do it.
Step 5: Shingle the Debris
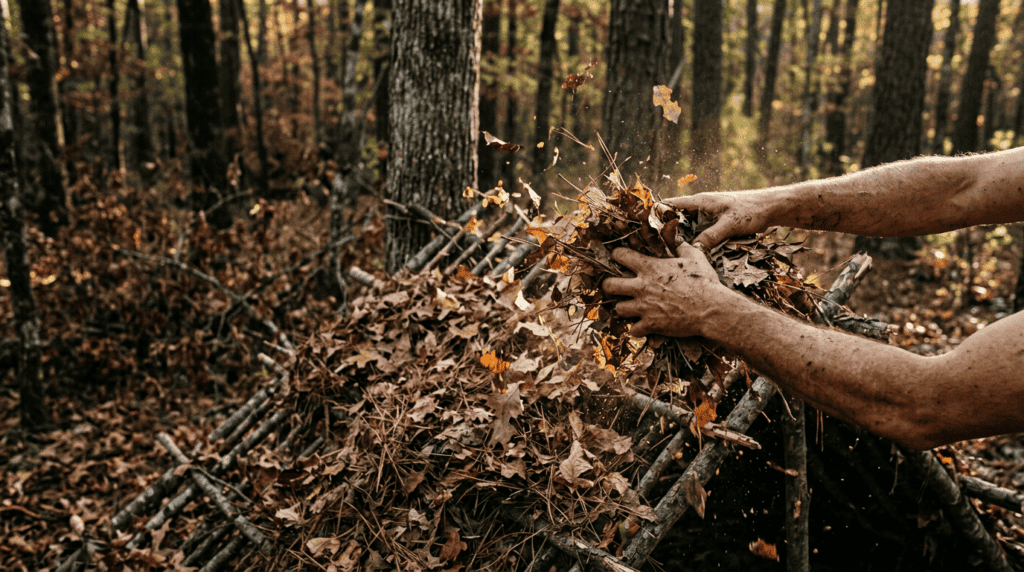
This is where the shelter actually gets built, and where nearly everyone stops too early.
Pile dead leaves, pine straw, ferns, grass, and duff over the entire frame. Start at the bottom and work up so the upper layers overlap the lower ones like shingles — that’s what sheds rain. Use your hands and forearms as rakes, or drag material in on a slab of bark or a leafy branch. It goes faster than you’d expect once you find a good pocket of litter.
The target is at least two feet of debris over the entire structure — measure it by pushing your arm in up to the elbow and checking that you don’t hit frame. Two feet sounds insane. It looks insane. It is also the number that works, because loose leaf litter compresses and settles significantly overnight, and dead air is the only thing insulating you.
Once the pile is up, lay a light scatter of sticks and branches over the outside. That’s your wind layer — it keeps a gust from stripping two hours of work off the roof.
Step 6: Stuff the Bed and Plug the Door
The ground will pull heat out of you faster than the air will. If you do everything above and sleep on bare dirt, you’ll still have a miserable night.
Stuff the entire interior with dry leaves, pine straw, and soft debris — as much as you can physically cram in, then more. You should have to burrow into it. When you’re inside, aim for six to eight inches of compressed insulation underneath you. This is the single highest-value part of the build.
Last, make a door plug: a loose bundle of debris, a leafy branch, or a bark slab you can pull into the entrance behind you. It doesn’t need to seal airtight — it needs to stop convection. Once you’re in, you’re the heat source, and the natural shelter’s only job is to keep what you produce.
Key Considerations for Successfully Building a Natural Shelter
Small is warm. The overwhelming instinct is to build something you’d want to live in. Resist it. Interior volume is the enemy — your body has to heat every cubic inch of it, and you have maybe 100 watts to work with. If it feels claustrophobic, you built it right.
Budget your energy and your daylight. A debris hut takes most people two to three hours. Start when you have three hours of light left, not one. Sweating heavily during construction soaks your base layer and sets you up for a cold night, so work at a pace you can sustain and vent your layers while building.
Dry debris beats abundant debris. Wet leaves conduct heat away instead of trapping it. If everything’s soaked, pull from under conifers, from the lee side of blowdowns, and from the middle of thick piles where the top layer has shed water. And build your bedding from the driest material you can find, even if the roof is damp.
Test it before dark. Crawl in while you can still see. Feel for cold spots, gaps of daylight, and places where a rib is poking you. Fixing a thin patch takes two minutes in the light and is nearly impossible at midnight in the rain.
Taking It to the Next Level: How to Build a Multi-Night Natural Camp
If you’re staying more than a night, the debris hut becomes your core and everything else gets built around it.
Add a fire reflector — a stacked wall of green logs or stone about three feet from the entrance, with a small fire between it and the shelter mouth. The wall pushes radiant heat back at the opening and roughly doubles what a small fire does for you. Keep the fire small and keep it well clear of a structure made entirely of dry leaves. That’s not a hypothetical risk.
Upgrade your bed to a raised platform of parallel logs topped with boughs. It gets you off the cold ground entirely, drains under you in wet weather, and is dramatically more comfortable on night three. And if you’ve got time and material, expand the frame into a wickiup — a conical or A-frame structure large enough to sit up in, with a slightly larger footprint and a smoke gap if you’re running an interior fire.
The other next-level skill worth building is bark work. Slabs of dead bark stripped from downed trees make excellent shingles, doors, ground sheets, and debris-hauling sleds — and they hold up far better than leaves in sustained rain.
Alternatives to a Debris Hut
Use what’s already there first. The fastest natural shelter is the one you don’t have to frame. A rock overhang, a dense conifer with skirted low branches, a hollow blowdown, or the cavity under a large root ball can cut your build time by 80% — you’re just adding debris and a windbreak rather than framing from scratch. Always scout for these before you commit to building. Check overhangs for loose rock and animal use before you settle in.
Lean-to. Faster than a debris hut and better if you have a fire and need working room, but far worse thermally. A lean-to reflects heat and blocks wind from one direction only; without a fire it’s substantially colder than a debris hut. Use it when you have reliable fire and dry conditions, or when you’re too low on daylight to finish a full hut.
Snow shelters. In deep snow, a quinzhee or snow trench outperforms anything you’ll build from debris, because snow is an outstanding insulator and it’s already everywhere. The catch is that both are far more labor-intensive, carry real collapse and carbon-monoxide risks, and require some practice to do safely. Learn them before you need them.
And the honest alternative: carry a contractor bag. A 55-gallon trash bag and a space blanket weigh a few ounces, cost about a dollar, and turn this whole article into a 20-minute job instead of a three-hour one. Knowing how to build without tools is insurance, not a reason to skip the insurance.
Wrapping Up and My Experience With Natural Shelter Building
Site selection, ridgepole, ribs, lattice, two feet of debris, and a stuffed bed. That’s the whole system. Nothing in it requires a tool, a knot, or a purchase — just a willingness to keep piling leaves long after your brain says that’s plenty.
I’ve built these in the Ouachita National Forest more times than I’ve counted, in every condition that country hands out: October cold snaps, spring rain that didn’t quit for two days, and one memorable November night where I learned firsthand what happens when you get lazy about ground insulation. The lesson from that night is baked into Step 6, and it’s the reason I put it in bold. The natural shelters I built right were unremarkable. That’s the highest praise a survival shelter gets.
Build one on a Saturday afternoon somewhere safe, with your truck a quarter mile away and no consequences. Time yourself. Sleep in it if you can. The gap between reading this and having done it once is enormous — and the night you actually need this skill is a terrible time to find that out.