
Crucial Water Storage for Preppers: Proven Ways to Stay Hydrated When the Grid Goes Dark
The Ugly Truth About Thirst
You can limp along for weeks without food. You can fake it for a couple of days without sleep. But take away water and your survival clock starts ticking fast.
When the grid fails and your faucet coughs out air, that “emergency stash” of LaCroix and wishful thinking won’t cut it. This isn’t about panic or perfection—it’s about building a simple, foolproof water storage plan that keeps you hydrated when the taps betray you.
This guide gives you the exact system—stored supply at home, filtration for the field, smart ways to find more, and what to carry when you’re on the move. No gear flex, no apocalypse cosplay. Just what works when things go sideways.
Why Water Storage Beats Every Other Prep
Everyone loves to argue ammo vs. generators vs. freeze-dried stroganoff. Meanwhile water quietly decides who makes it through the first week.
Dehydration doesn’t start by killing your body—it kills your clarity. Headache. Brain fog. Bad decisions. Then real danger. Most folks have less than a couple gallons total in the house and figure the store “will still be open.” Cute.
Rules of thumb save lives: plan at least one gallon per person per day for drinking, basic cooking, and minimal hygiene. Heat, exertion, or illness? You’ll need more. The CDC and FEMA both treat water storage as a first priority in emergency readiness for a reason: nothing else works if you’re dry.
Bottom line: water storage is the foundation. Food, defense, shelter—all easier when you can think straight and keep moving.
How Much Water You Really Need (Spoiler: It’s More Than You Think)
Before you start hoarding barrels like a desert camel, figure out what your household actually needs—then pad it.
Factors that raise daily requirements:
Heat & season: Hot climate or summer? Plan 1.5–2 gallons per person daily.
Exertion: Manual labor, security rotations, hauling supplies? Add +0.5 gallon per person.
Medical needs: Pregnant/nursing or medical conditions = +25–50%.
Pets: A medium dog drinks ~0.5 gallon/day; scale for size and activity.
Minimum Water Storage Targets
| Household | 2 Weeks | 30 Days | 60 Days | 90 Days |
|---|---|---|---|---|
| 1 person | 14 gal | 30 gal | 60 gal | 90 gal |
| 2 people | 28 gal | 60 gal | 120 gal | 180 gal |
| 3 people | 42 gal | 90 gal | 180 gal | 270 gal |
| 4 people | 56 gal | 120 gal | 240 gal | 360 gal |
| 5 people | 70 gal | 150 gal | 300 gal | 450 gal |
| 6 people | 84 gal | 180 gal | 360 gal | 540 gal |
Based on 1 gallon per person/day. Increase by 50–100% for heat or heavy activity.
Look at that 30-day line: a family of four needs 120 gallons minimum—more than two 55-gallon barrels, and that’s the bare number. This is why your plan should combine container types, treatment, and rotation. Which brings us to the system.
The Four-Layer Water Plan Every Prepper Needs
Forget complicated “systems.” Build resilience with four overlapping layers:
- Stored water at home
- Filtration for sketchy sources
- Sourcing more water
- Hydration on the move
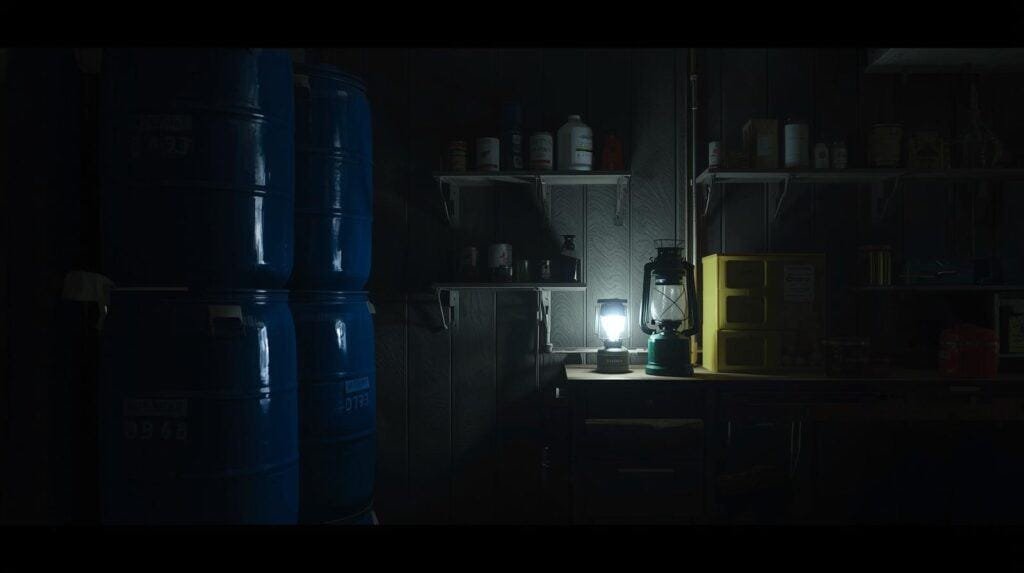
Layer 1 — Stored Water (Home Base)
Stored water is boring—until you’re thirsty. Then it’s gold. Make this your foundation.
Short-term water storage (fast start):
Bottled water: Pre-sealed, portable, brain-dead simple. Rotate every ~2 years for taste.
5–7 gal jugs: Manageable weight, stackable, refillable (Scepter military water cans are tough).
Collapsible cubes (5–10 gal): Fold flat when empty. Great for small spaces or surge capacity.
Long-term water storage (serious capacity):
WaterBricks (3.5 gal): Modular, interlocking, portable. Build walls of water as budget allows.
55-gal barrels: Cost-efficient bulk storage. Use food-grade hose for filling; park them on a stand for easy siphoning. Follow EPA safe water storage guidelines for proper treatment.
Quick Container Comparison
| Container | Capacity | Pros | Cons | Best Use |
|---|---|---|---|---|
| Bottled water | 16–20 oz | Ready, portable | Expensive per gallon, bulky | Quick start, rotation |
| 5–7 gal jugs | 5–7 gal | Refillable, manageable | Limited total capacity | Core household stash |
| WaterBricks | 3.5 gal | Stackable, portable | Higher $/gal | Modular long-term |
| 55-gal barrel | 55 gal | Best $/gal | Heavy, not portable | Long-term base |
| Collapsible cube | 5–10 gal | Space-saving | Less durable | Backup/surge |
Treat & label like a pro:
Treat with unscented household bleach: 1 teaspoon per 5 gallons (plain chlorine, no additives).
Label each container with fill date + method; rotate every 6 months.
Store cool, dark, away from UV and heat (50–70°F is ideal).
Disperse your stash:
Don’t keep all your eggs (water) in one basket (room). Use basement + interior closet + a temp-controlled area in the garage. Keep a cache upstairs in case of flooding.
Consider low-signature storage (in-wall, under-bed, or concealed totes) to reduce visibility. The American Red Cross recommends dispersing emergency supplies throughout your home.
Layer 2 — Filtration (Field Ready)
Storage runs out. Filters make the world drinkable again. Understand the difference:
Filtration (hollow fiber/ceramic): pulls protozoa & bacteria.
Purification (chem/UV/advanced): adds virus protection.
Best practice: filter first, then purify if needed.
Top Portable Options (2025)
| Filter | Price | Weight | Lifespan | Viruses? | Best For |
|---|---|---|---|---|---|
| Sawyer Mini | ~$25 | 2 oz | 100,000 gal | No | Bug-out, budget EDC |
| LifeStraw Peak | ~$45 | 2.5 oz | 4,000 L | No | Day hikes, kits |
| Grayl Geopress | ~$90 | 15.9 oz | ~250 L | Yes | Fast field press |
| Katadyn Pocket | ~$400 | 20 oz | 50,000 L | No | Long-term durability |
| MSR Guardian | ~$350 | 17.3 oz | 10,000+ L | Yes | Expedition-grade |
Sawyer Mini: Dirt cheap, tiny, enormous lifespan—flow slows in cold; no viruses. Available at REI and most outdoor retailers.
LifeStraw Peak: Improved flow, great squeeze setup for quick fills.
Grayl Geopress: The push-press king—adds virus protection and speed.
Katadyn Pocket: Heirloom tool; ceramic element cleans and keeps going.
MSR Guardian: Self-cleaning beast for the worst water; pricey, proven.
Backup purification:
Boil: Rolling boil 1 minute (3 minutes at altitude) kills critters; doesn’t fix chemicals. FEMA recommends boiling as the safest purification method.
Tablets: Aquatabs / Potable Aqua—light, cheap, virus coverage. Keep 100+ on hand.
UV pens: SteriPEN-style—great add-on, but needs batteries/power.
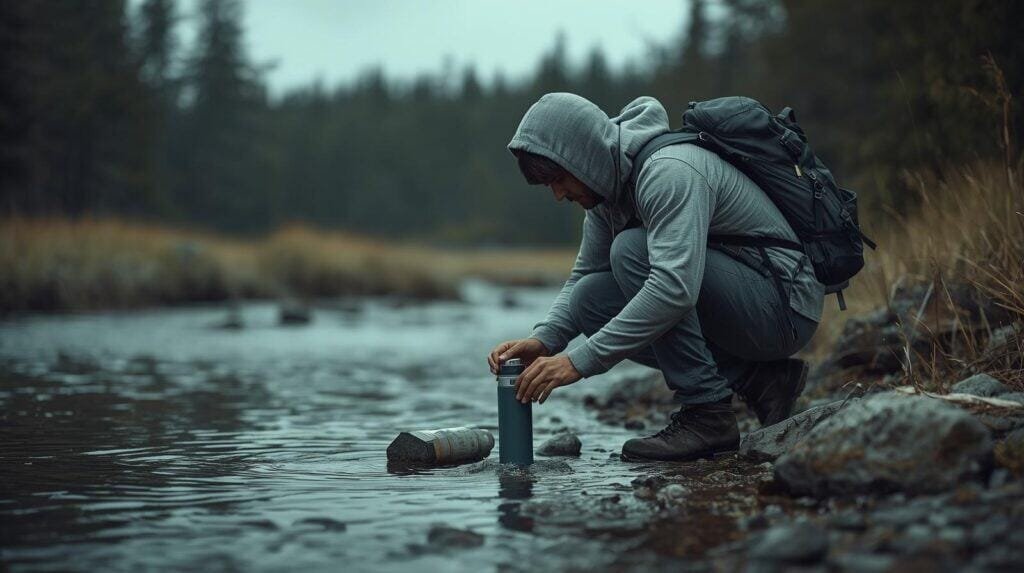
Layer 3 — Sourcing Water in the Wild
When every last bottled drop is gone, you’ll need to find water. Learn the signs, then treat it right.
Natural sources:
Streams/rivers/lakes: Prefer clear, moving water. Always filter; assume upstream contamination.
Springs & seeps: Cleanest natural source—still filter. Look for wet spots on slopes.
Dry beds: Dig 1–2 feet on outer bends; let it seep and settle before filtering.
The upstream rule: If there are livestock, people, or agriculture upstream, you have pathogens. Boil (and/or purify) after filtering.
Rainwater: the free reservoir
A 1,000 sq-ft roof can yield ~600 gallons from a single inch of rain.
Add a basic catchment: gutters → leaf screen → barrel with spigot. Ready.gov provides guidance on emergency water collection methods.
For temporary capture: pitch a tarp or plastic sheeting to a clean funnel container.
Tiny wins: dew collection
Tie absorbent cloths to ankles and walk dewy grass at dawn. Wring into a pot. Not a lot—but it adds up, especially in humid areas.
Hard pass: where not to drink
Near mines, industry, or heavy ag runoff (chemicals).
Water that’s discolored, foamy, or smells “wrong.” Filters don’t fix toxins.
Layer 4 — Hydration on the Move
Mobility changes everything. Water becomes weight, time, and terrain.
What to carry (baseline):
Hydration bladder (2–3 L): Hands-free drinking; keeps you sipping early before you get behind. CamelBak and Source Tactical are industry leaders.
Collapsible canteens (1–3 L): Dirty/clean bag pairs speed filtering and pack tiny when empty.
Electrolytes: LMNT/Liquid I.V./salt tabs—hydration isn’t just water; it’s minerals.
Daily Drinking Needs by Exertion/Climate
| Activity Level | Base Need | Hot Climate | Cold Climate | Notes |
|---|---|---|---|---|
| Resting | 0.5 gal | 0.75 gal | 0.5 gal | Minimal movement |
| Light | 1 gal | 1.5 gal | 1 gal | Walking, chores |
| Moderate | 1.5 gal | 2 gal | 1.25 gal | Hiking, setup |
| Heavy | 2+ gal | 3+ gal | 2 gal | Labor, defense |
| Extreme | 3+ gal | 4+ gal | 2.5 gal | Desert, illness |
Add 0.5–1 gal/day for cooking & hygiene.
Route discipline:
Mark known refill points; never count on a blue line on a map.
Drink early and steady; the “I’ll push through” plan leads to dumb decisions.
Cache water on routes if you can. Future-you will send a thank-you note.
How to Keep Your Water Fresh, Safe, and Not Gross
You did the hard part; now don’t ruin it.
Storage best practices:
Cool, dark, stable temps (50–70°F). No direct sun. Avoid attics/garages that hit triple digits.
Label with source, treatment, and fill date.
Keep redundancy: aim for ~⅓ stored, ⅓ filtration capacity, ⅓ sourcing options.
Rotation Cheat Sheet
| Storage Type | Rotate | Treat? | Notes |
|---|---|---|---|
| Bottled water | ~2 years | No | Taste check; swap if off |
| Treated tap (bleach) | 6 months | Yes | 1 tsp/5 gal; log dates |
| Untreated tap (municipal) | 6 months | Maybe | Rotates faster in warm rooms |
| Rainwater (filtered) | 3 months | Yes | Higher contamination risk |
| Well water | 6 months | Yes | Annual quality test |
Common failures:
Non-food-grade containers: If it held milk/chemicals, it’s not a water future.
No treatment: Algae & bacteria happen. Treat or buy sealed bottles.
No practice: Try your filter now. Find leaks now. Don’t let thirst be your teacher.
Your Step-By-Step Water Storage Plan (Do This Today)
- Calculate needs (people + pets × days). Pick a target (start with 30 days).
- Buy core containers (mix of 5–7 gal jugs + 55-gal barrel + some WaterBricks).
- Treat & label as you fill. Log dates. Set 6-month calendar reminders.
- Add filtration (Sawyer Mini kits for each bag; Grayl/Guardian for speed/viruses).
- Map local sources (rain catchment, nearby streams, public taps). Practice collecting.
- Pack mobile capacity (3L bladder + 2L collapsible + electrolytes per person).
- Test your system this month: cook with stored water, run a “tap’s out” weekend.
- Expand: work toward 60–90 days and a low-signature storage plan.
Remember: Done beats perfect. Perfect comes with rotation.
Wrapping Up: Build It, Test It, Trust It
Water is boring—right up until the moment it isn’t. When the grid hiccups, pipes freeze, or a storm turns shelves into bare metal, you’ll be calm, capable, and hydrated because you built a real water storage plan.
Start simple. Stack containers. Treat and label. Add filtration. Learn to find more. Practice before you’re thirsty.
Because you prepared. Because you prioritized water storage. Because you understood that water isn’t just important—it’s everything.
Your water storage system is the foundation of survival. Build it right, maintain it consistently, and you’ll never face a disaster unprepared.
Additional Resources
Ready.gov Water Emergency Planning
FEMA Emergency Water Supply Kit
American Red Cross Water Safety
Heads-Up, Fellow Preppers:
Some links in this post are sponsored or affiliate links. If you click and buy, I may earn a small commission—enough to restock my peanut butter and maybe add one more can of chili to the stash. I only recommend gear I trust, use, and would hide in a bug-out bag.