The Financial Foundation: Building Your Prepper Emergency Fund
Part 1 of 4 in the Financial PreparThe Financial Foundation: Building Your Prepper Emergency Fund
The Financial Foundation: Building Your Prepper Emergency Fund
When most people think about prepping, images of stockpiles of food, water filtration systems, and bug-out bags loaded with survival gear immediately come to mind. However, one critical aspect of preparedness doesn’t fit neatly into a Mylar bag or a tactical backpack: money. Your prepper emergency fund is arguably the most versatile survival tool you can have, yet it is often the most overlooked part of a comprehensive preparedness plan. Building a prepper emergency fund should be incorporated into your overall budget and financial planning to ensure true readiness.
The reality is that the majority of emergencies we face are not zombie apocalypses or EMP strikes but more common financial crises such as job losses, medical emergencies, car breakdowns, or natural disasters that disrupt your income for weeks or even months. In these situations, having a well-funded prepper emergency fund can save you far more effectively than another case of MREs. Making your emergency fund a top financial priority within your budget ensures you have the money set aside to manage unforeseen expenses and maintain stability when disaster strikes.
This article is the first installment in a four-part series on financial preparedness for preppers. Here, we will lay the groundwork by exploring how to build a robust prepper emergency fund that goes beyond conventional financial advice, addressing the unique needs of preparedness-minded individuals. Remember, it’s not just about stockpiling supplies—it’s essential to proactively prepare your finances as part of comprehensive emergency readiness.
Why Your Prepper Emergency Fund Needs a Different Approach
Traditional financial advice often recommends keeping three to six months worth of expenses in a savings account. While this is solid baseline guidance for the average person, a prepper emergency fund requires a different approach due to the unique risks and challenges faced by preppers.
Your prepper emergency fund must do more than just cover your mortgage and grocery bills during a temporary setback. It needs to be designed with the following considerations in mind:
- Supply Chain Disruptions: During events like the 2020 pandemic, supply chains broke down, making everyday goods like toilet paper and ammunition scarce or expensive. Having a prepper emergency fund means you can afford to purchase critical supplies at any price, avoiding the scramble and inflated costs others face.
- Infrastructure Failures: Extended power outages or internet disruptions can make digital banking inaccessible. In such scenarios, your bank balance means little if you cannot access it. Credit card systems, debit cards, and mobile payment apps may become useless during disasters or technical issues. This is why keeping physical cash—actual dollars—on hand as part of your prepper emergency fund is essential for immediate needs like food, gas, or evacuation when electronic payment systems are unavailable.
- Economic Instability: Inflation erodes the purchasing power of your savings over time. What seemed like an adequate emergency savings account five years ago might only cover half your expenses today. Smart preppers protect their emergency fund from currency devaluation by diversifying their holdings.
- Extended Unemployment: In specialized or rural job markets, finding new employment can take much longer than the national average of three to six months. Your prepper emergency fund needs to account for this potential extended period without income.
In essence, the prepper emergency fund isn’t just about the amount of money saved; it’s about accessibility, diversification, and strategic placement of your funds to ensure you’re truly prepared for any crisis. Avoid spending your emergency fund dollars on non-emergencies so you maintain liquidity and readiness when you need it most.nd readiness when a real crisis hits.
The Three-Tier Approach to Your Prepper Emergency Fund
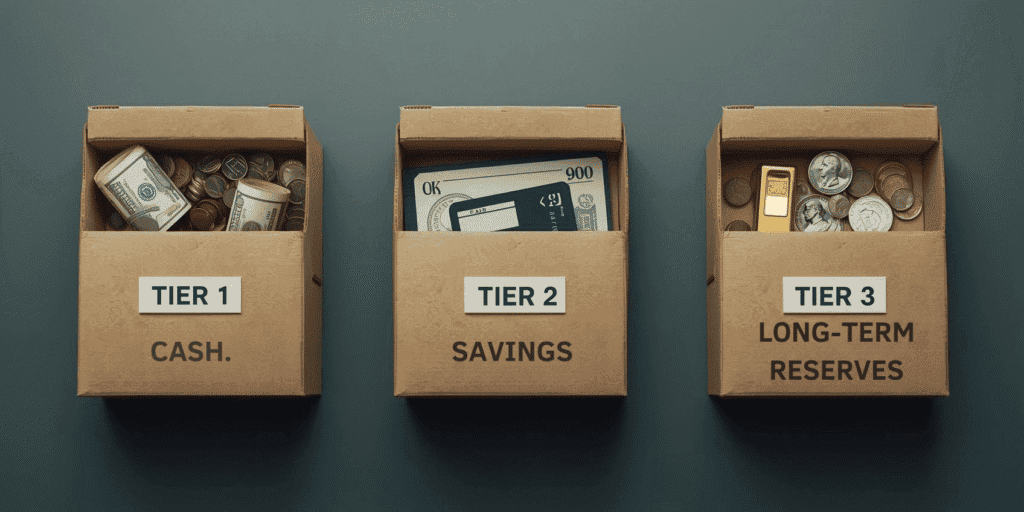
Rather than placing all your emergency savings in a single account, preppers should adopt a three-tier system. This approach balances immediate cash access with long-term security and growth potential, ensuring coverage for both short-term crises and prolonged disruptions. It’s also important to secure cash reserves in various locations within your house to protect against theft or loss.
Tier 1: Immediate Access Cash (1-2 Months of Expenses)
The first layer of your prepper emergency fund is physical cash kept in secure locations you can access instantly. This cash reserve is vital for the moments right after disaster strikes—before banks open, ATMs function, or you can safely leave your home.
Amount to Keep: Calculate your bare-bones monthly expenses, including mortgage or rent, utilities, food, fuel, and medications, then multiply by one or two. For most families, this equates to $3,000 to $8,000 in cash.
Storage Strategy: Never keep all Tier 1 cash in one place. Use the “rule of thirds”: one-third in a home safe or lockbox, one-third in a trusted family member’s home or a safety deposit box, and one-third in your vehicle emergency kit or bug-out bag. This distribution protects your fund from theft, fire, or forced evacuation.
Cash Denominations: Keep mostly $20 and $10 bills for practical transactions, with some $5 and $1 bills for small purchases. Large bills like $100s are harder to break in emergencies. Also, consider keeping $500 to $1,000 in quarters if your area relies on coin-operated services like laundromats.
Protection: Cash can degrade due to moisture and pests. Store bills in waterproof containers with desiccants and rotate your cash every few years by depositing old bills and withdrawing new ones. Some preppers vacuum seal cash for long-term storage, though this reduces immediate accessibility.
Tier 2: Liquid Accessible Savings (3-6 Months of Expenses)
This tier consists of funds held in traditional banking products that are safe, earn interest, and can be accessed within a few business days, bridging the gap between immediate cash and long-term reserves.
High-Yield Savings Accounts: Online banks offer competitive interest rates (4-5% APY) and easy access. Institutions like Marcus by Goldman Sachs, Ally Bank, and American Express Personal Savings are excellent options. Transfers typically take 2-3 business days.
Money Market Accounts: Similar to savings accounts but may offer check-writing and debit card access, allowing more flexibility. These usually limit withdrawals to six per month but provide slightly better access to your money.
Checking Account: Keeping a portion of your emergency fund in a checking account ensures immediate liquidity for urgent expenses, as funds are instantly accessible for payments or withdrawals.
Certificates of Deposit (CDs): A CD ladder with staggered maturities (3, 6, 9, 12 months) can increase interest earnings while maintaining periodic access. However, only about 25-30% of Tier 2 funds should be in CDs due to early withdrawal penalties.
Diversification: Spread your Tier 2 funds across multiple banks or credit unions to protect against institutional failures or freezes. Credit unions are a reliable and insured place to keep emergency savings, offering deposit insurance protection similar to banks. FDIC insurance covers up to $250,000 per depositor per bank, and credit unions are protected by the NCUA, so diversifying ensures full coverage.
Tier 3: Long-Term Reserves and Wealth Protection (6-24 Months of Expenses)
The third tier focuses on preserving wealth over the long term and protecting against inflation and economic upheaval. Accessibility is reduced, but these funds provide crucial stability.
I Bonds: Issued by the United States government, I Bonds earn interest adjusted for inflation, protecting your emergency savings from currency devaluation. They cannot be redeemed in the first 12 months, and early redemption within five years forfeits three months of interest, so they’re best for money you don’t plan to touch soon.
Precious Metals: Gold and silver act as a hedge against currency collapse and inflation. While they should only constitute 10-20% of your emergency fund due to liquidity and volatility concerns, physical precious metals can preserve wealth when fiat currencies fail. Store them securely and keep this information limited to trusted family members.
Treasury Securities: Treasury bills and notes offer safety backed by the full faith and credit of the U.S. government, with better returns than savings accounts. They can be purchased through TreasuryDirect.gov or brokerage accounts, and a secondary market exists for early sales.
Conservative Investment Accounts: For funds covering 12-24 months of expenses, consider a conservative portfolio with about 60% bonds and 40% stocks or target-date funds with automatic rebalancing. Keep these in taxable accounts for penalty-free access if needed.
Tier 3 funds are your last resort, reserved for prolonged crises after Tiers 1 and 2 are exhausted.
Calculating Your Prepper Emergency Fund: How Much Is Enough?
While financial advisors often recommend three to six months of expenses, this range is too broad for preppers who face unique risks. Your prepper emergency fund target depends on several personal factors:
Employment Stability: Stable government or healthcare jobs may require only three to four months worth of expenses, while self-employed individuals or those in cyclical industries should aim for nine to twelve months.
Income Diversity: Dual-income households or those with passive income sources can reduce their emergency fund target accordingly.
Health and Medical Needs: If you or your family have chronic conditions requiring expensive treatments, add at least three months of out-of-pocket medical expenses to your fund.
Geographic Considerations: Rural areas may have fewer job opportunities but lower costs, while urban areas have more jobs but higher expenses. Adjust your fund based on your local economy’s resilience.
Debt Obligations: Mortgage, car loans, and student loans increase your monthly expenses and thus your emergency fund needs.
Dependents: Children, elderly parents, or dependents increase expenses and reduce job flexibility, warranting a 10-20% increase in your fund per dependent.
To ensure uninterrupted access to your funds during emergencies, set up electronic payments for bills and benefits. Receiving social security benefits electronically is also crucial, as it helps maintain access to federal support if mail delivery or physical banking is disrupted.
Here’s a practical formula:
Base Prepper Emergency Fund = Monthly Essential Expenses × Base Months (3-12)
Then adjust:
- +20-30% if single-income household
- +30-50% if self-employed
- +10-20% per dependent
- +3 months of maximum medical expenses
- Passive income continuing during crisis
For example, a self-employed person with $4,000 monthly expenses and two children might target about $57,600.
Common Mistakes That Drain Your Prepper Emergency Fund
Many preppers inadvertently sabotage their financial preparedness. Avoid these common pitfalls:
Gear Addiction: Overspending on gadgets and supplies can drain funds needed for your emergency savings. Always ask whether a purchase is necessary and wait 30 days before buying expensive prep gear if your emergency fund isn’t fully funded.
Ignoring Opportunity Costs: Every dollar spent on gear is a dollar not saved or used to pay down debt. Prioritize building your Tier 1 emergency cash before investing heavily in supplies.
Lifestyle Inflation: As income grows, expenses often rise to match, leaving no room for savings. Commit to saving at least 50% of raises or bonuses toward your emergency fund and debt.
Neglecting Automation: Relying on willpower to save money rarely works long-term. Set up automatic transfers from your paycheck to your savings accounts to make saving non-negotiable, make this a no brainer type situation.
Raiding Funds for Non-Emergencies: Avoid dipping into your emergency fund for wants like vacations or gifts. Your fund is for genuine crises like job loss, medical emergencies, or critical repairs.
Failing to Adjust for Inflation: Review and update your emergency fund annually to maintain purchasing power. Use inflation-protected investments in Tier 3 to hedge against currency devaluation.
Building Your Prepper Emergency Fund: The Action Plan
Here’s a step-by-step roadmap to build your prepper emergency fund effectively:
Months 1-2: Assess and Establish Calculate your monthly essential expenses using bank and bill statements. Determine your emergency fund target using the formula above. Open a high-yield savings account if you don’t have one, and set up automatic transfers—even $100 monthly—to start saving.
Months 3-6: Build Tier 1 Cash Reserve Focus on accumulating one to two months of expenses in physical cash, setting aside $500 to $1,000 per paycheck if possible. This may slow your Tier 2 growth temporarily but is critical for immediate access.
Months 7-18: Accelerate Tier 2 Savings After reaching your Tier 1 goal, direct funds to your liquid savings accounts. Cut discretionary spending or take on side gigs to boost savings. Funnel windfalls like tax refunds or bonuses into your emergency savings.
Months 19-36: Expand Tier 2 and Start Tier 3 Once you reach three months in Tier 2, split contributions between Tier 2 and Tier 3. Open a TreasuryDirect account to buy I Bonds and begin purchasing precious metals gradually. Consider conservative investment accounts for longer-term reserves.
Month 37 and Beyond: Maintain and Optimize After reaching your targets, switch to maintenance mode. Review your fund quarterly, adjust for inflation, rotate your physical cash, and rebalance investments annually.
Working with a Financial Professional: Expert Guidance for Preppers
Building a robust emergency fund is a cornerstone of financial preparedness, but navigating the world of savings accounts, investment options, and risk management can be overwhelming—especially for preppers with unique priorities. That’s where working with a financial professional can make all the difference. An experienced financial advisor brings expertise and objectivity to your financial planning, helping you create a customized emergency savings account strategy that fits your lifestyle, income, and risk tolerance.
A financial professional can help you determine exactly how many months worth of expenses you should set aside, factoring in your job stability, family needs, debt obligations, and other expenses. They’ll guide you in setting up a separate savings account or a money market account specifically for your emergency fund, ensuring your emergency cash is both accessible and earning interest. With their help, you can automate direct deposit contributions from your paycheck, making saving money a seamless part of your monthly routine.
Beyond just building your emergency fund, a financial advisor can help you develop a comprehensive financial preparedness plan. This includes budgeting for regular bills, managing debt, reviewing insurance policies like car insurance and health coverage, and even exploring investments in precious metals or other assets to hedge against inflation and market volatility. They can also advise on the best banks or credit unions for your needs, ensuring your funds are protected by the full faith of the United States government through FDIC or NCUA insurance.
When disaster strikes, having a financial professional in your corner means you’re not alone in making tough decisions about accessing your emergency savings or reallocating funds. They can help you maintain your emergency fund, adjust your plan as your life changes, and ensure your financial safety net keeps pace with inflation and other risks. If you’re considering investing part of your emergency fund for growth, a financial advisor can help you balance risk and liquidity, so you’re always prepared for emergencies without sacrificing long-term benefits.
Choosing the right financial professional is key. Look for someone who understands the unique challenges preppers face—someone who values financial preparedness, can help you set up a separate emergency savings account, and is familiar with strategies like diversifying into precious metals or using a money market account for quick access. Ask about their experience with clients who prioritize disaster readiness and make sure they’re willing to tailor their advice to your specific goals.
Ultimately, working with a financial professional gives you the confidence that your emergency fund—and your broader financial plan—are built to withstand whatever the future holds. Whether you’re just starting to save or looking to optimize your existing accounts, expert guidance can help you protect your family, your income, and your peace of mind. In the unpredictable world we live in, that’s an investment worth making.
The Peace of Mind Premium
Building a substantial prepper emergency fund requires discipline and sacrifice. You may skip purchases others enjoy and question if you’re being too cautious with your money. These doubts are normal.
But consider the alternative: living paycheck to paycheck, one crisis away from financial disaster, and constantly stressed about money. The peace of mind that comes from knowing you can survive six months without income is invaluable. A properly funded prepper emergency fund buys you time, options, and dignity during hardship.
Your prepper emergency fund is the ultimate preparation because it applies to every emergency, disaster, and crisis. It protects your family and preserves your future. Start today—even setting aside $50 from your next paycheck or withdrawing $100 cash for your Tier 1 fund is a crucial first step. Your future self will thank you.
Coming Next: Part 2 – Smart Spending: How to Prep Without Going Broke
In the next article, we will explore strategies to acquire gear, supplies, and skills without sabotaging your prepper emergency fund. Learn to prioritize purchases, leverage sales, avoid the gear trap, and make smart buy-versus-build decisions that maximize value and minimize waste.
Subscribe to Adventure Wiser’s newsletter to stay updated on this series and more preparedness content.